
 This is Alpha, the first-born, when he was 2YO.
 This is Beta, the second-born, when he was about 2YO.
 This is Gamma, the third-born, when he was about 18MO.
Mirror, Mirror, on the Van
Jul
19
2011
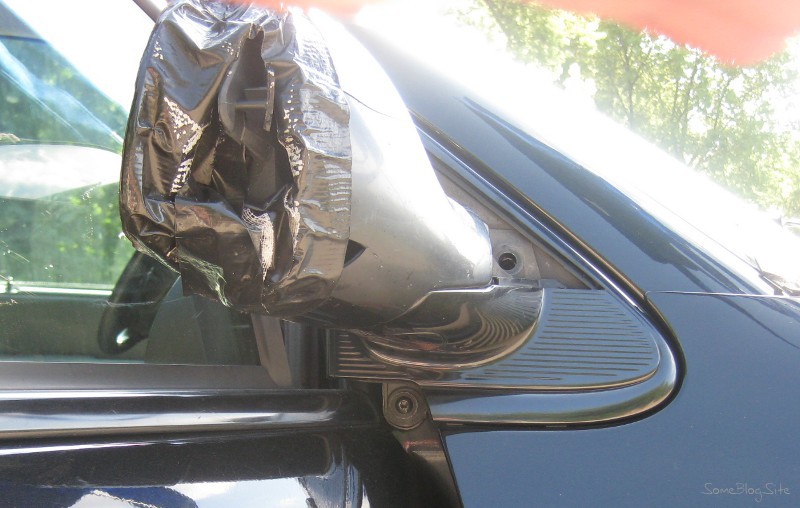
The passenger-side mirror of our van has been cracked for a while – not just the mirror part but also the plastic housing. The housing had some sharp edges, so I wrapped it in some black duct tape after it tore a hole in one of my better T-shirts.


After over a year of driving around with the mirror in that state (what? it was still mostly functional…) I decided to replace it. Why now? Because we had a couple of vacations that required some driving, and it would be a good time for that.
I had inquired about getting it replaced, but the dealership quoted over $100 (I forget exactly, $150 maybe?). I figured that, since I could still use the broken mirror and it wasn’t legally required anyway, why blow $150 on it? I could buy a mirror and try to install it myself. The total that way would be $50.
How long does it take to replace a side mirror? I took me about an hour. But I was staging photographs and noting things. If you skip those parts, it would have been 40 minutes. And if you skip the unnecessary steps, then it should take you 30 minutes.
The Replacements
Here are the 8 steps, with helpful photos, I took to replace the mirror on my 2005 Dodge Grand Caravan:
Step 1: Open the Old Mirror
Take the flat (slotted) screwdriver and stick it in the seam in the middle of the fairing. Pry it open. You’ll want to take off the top part of the plastic. Don’t bother being careful, since you’re replacing this part and the mirror is already damaged anyway.
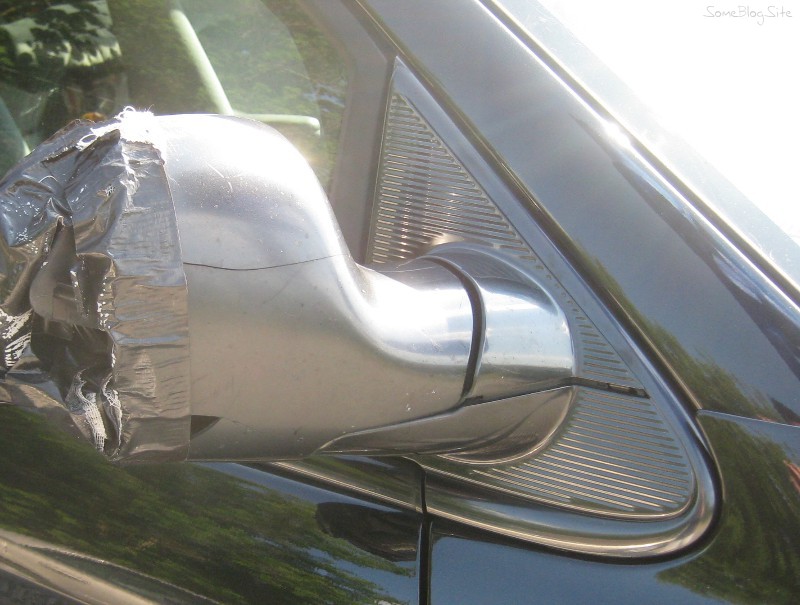
Just keep prying and pulling. But don’t pry against the minivan body – you don’t want to replace (or repair) the sheet metal. Eventually the top of the plastic housing just pops off, since it is held in place by plastic tabs. Now you can see the bolts.
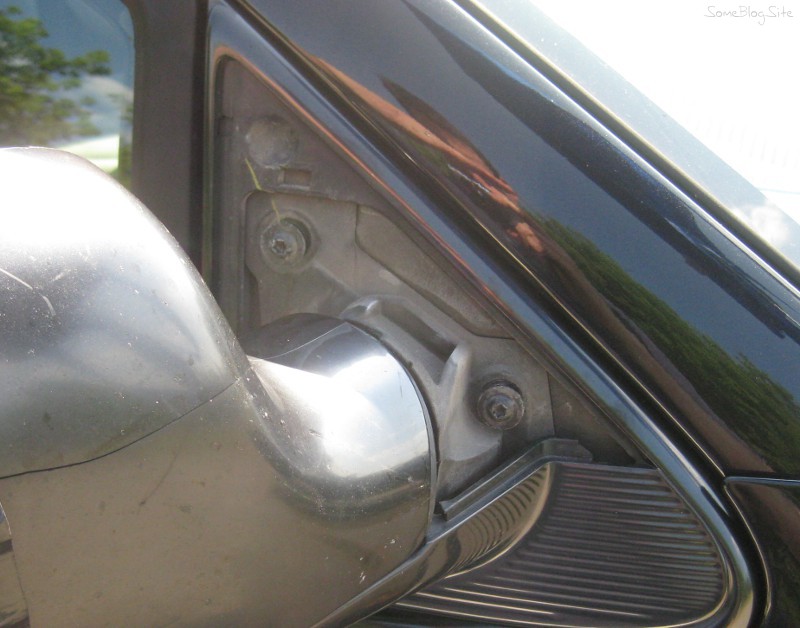
Step 2: Detach the Old Mirror
Grab your star (hex) bit for these bolts. I don’t know which size it is. My screwdriver kit came with 4 different sizes, so I just tried them until one fit. Unscrew the bolts and save them for later, since you’ll need them to attach the new mirror.
Note that this can be a little tricky, since the mirror is slightly in the way. You can make the unscrewing easier by breaking off the mirror, but do not use that same process later for step 6.
The bolts are fairly tight, so don’t try to use a screwdriver like I did.
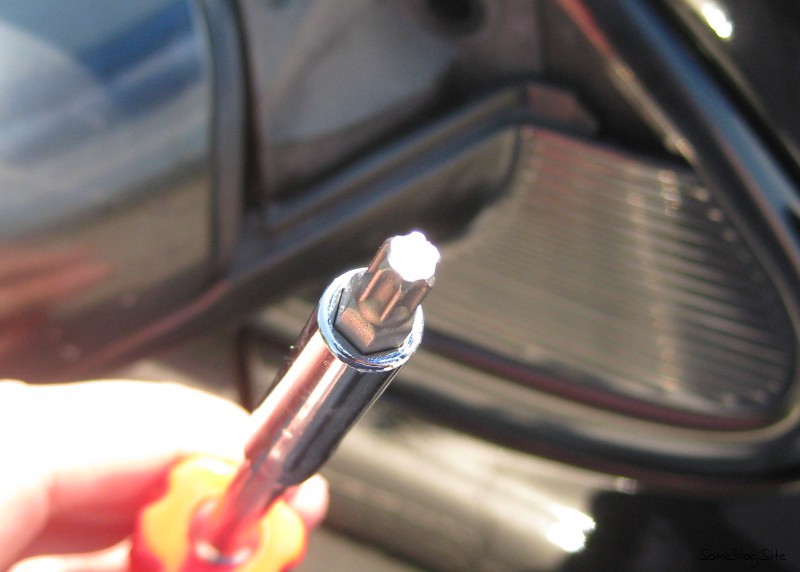
Instead, start with the socket wrench.
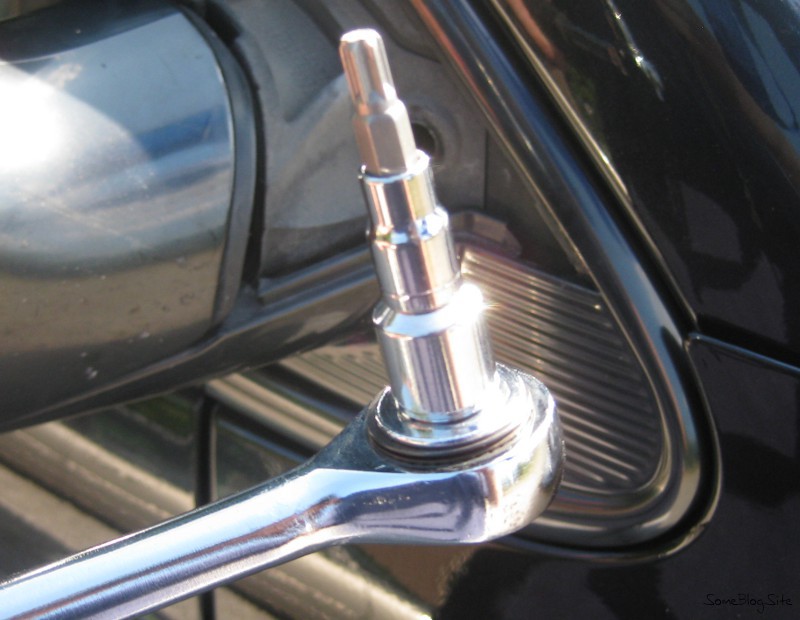
Leverage is your friend.
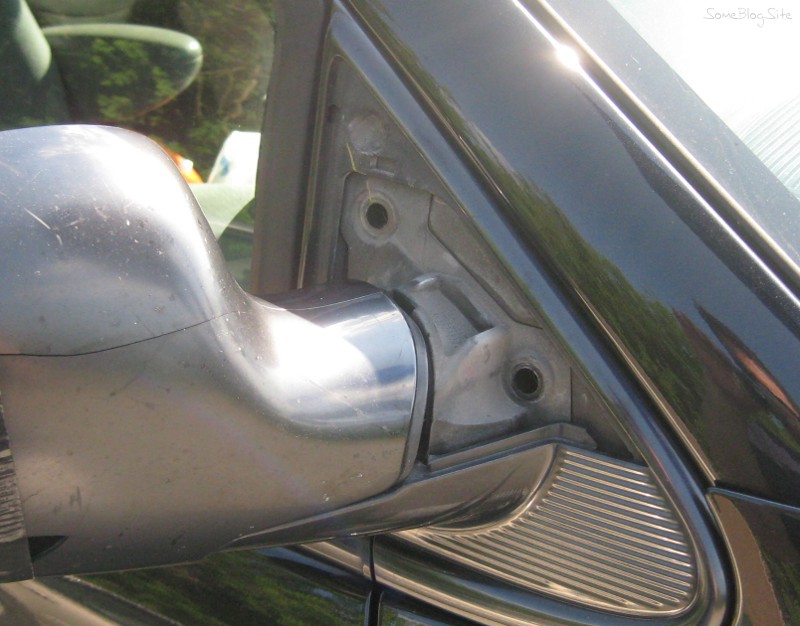
Unscrew both bolts, then pull on the mirror and wonder why it won’t come off. Now open the van door and notice a third bolt.
Remove that bolt and you’re done with step 2.
Step 3: Open the Glove Box
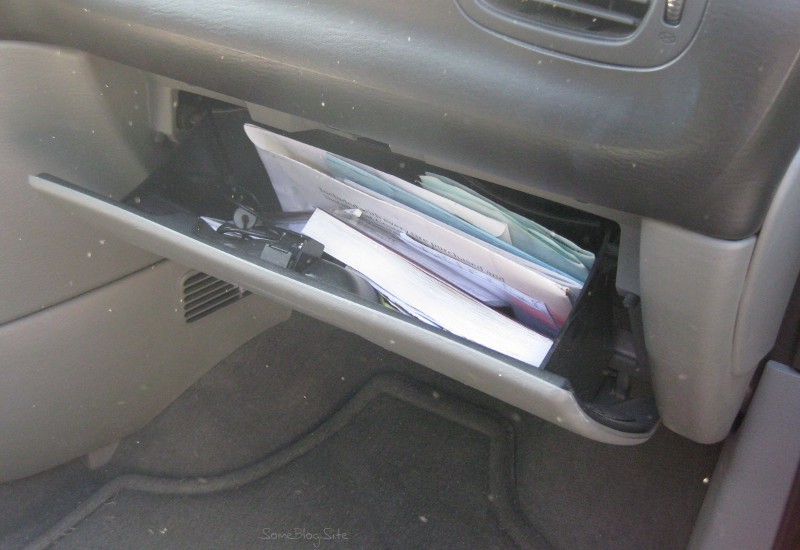
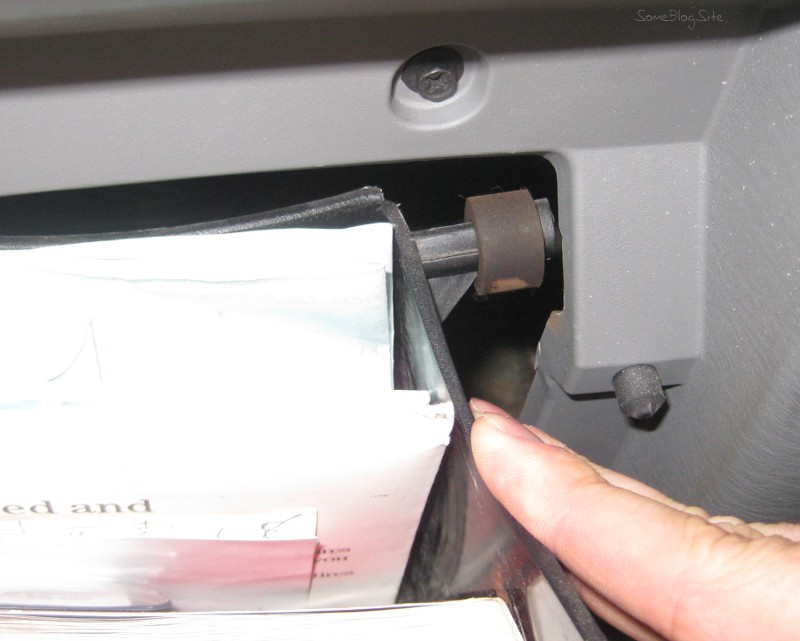
Now you need to find the wire that is that last thing connecting the mirror to the van. The glove box can open quite easily – simply press inward on the sides of the glove box, near the rubber bumper, and the glove box tilts all the way down and gives you access to a bunch of wiring behind it.
The problem with this is that it dumps all the paperwork onto the floor.
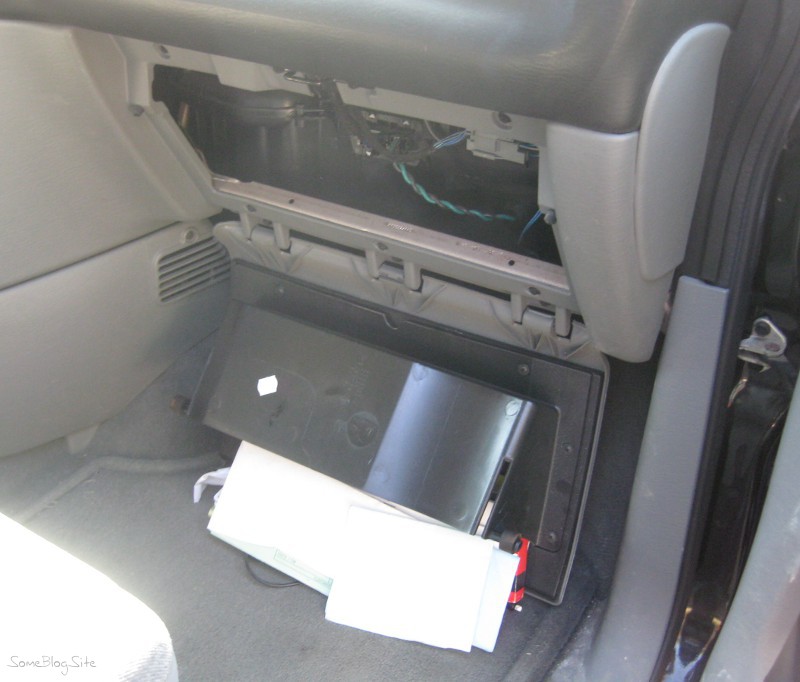
The other problem with this is that it does not provide access to the mirror wiring harness. So skip this step if you’re actually trying to replace your mirror. If you did perform this step, reverse the procedure to put the glove box back together.
Step 4: Open the A-Pillar


If you don’t have a power mirror (i.e. you open the window and push on the mirror in order to move it), then you can skip to step 6. Those of you in the civilized world can continue reading this step.
The wiring is under the flat dashboard cover (with the speaker grills and such). But that cover is held in place by the A-pillar (the part of the vehicle that supports both the roof and the windshield [the part of the body between the windshield and the front window]), so you need to open the A-pillar.
My mirror was on the passenger side, whose A-pillar is held in place by some bolts. My guess is that the driver-side pillar is held in place by clips and you just need to pry and pull it open. But that’s just a guess for the driver’s A pillar.
For the passenger’s A pillar, squeeze and pull the plastic caps at both ends of the grab handle. They are clipped in place, so they just pop out of place. That exposes the bolts. Grab your hex socket. I used a 3/32 because I’m a proud American, but you less patriotic people can use a 10mm socket if you’d like.
Unscrew those all the way and then the handle comes off. Now grab and pull the plastic that covers the A pillar. It should pop out of place. For the bottom, you’ll need to twist and pull up. Once that’s done, the A-pillar is open and you can see the wiring for the mirror.
Step 5: The Wiring
You see the wire, but you need to find the connector. Simply lift the edge of the dashboard cover and it opens.


Reach your hand down into the area where the wire goes and feel for the connector. You can’t really see it, because it is clipped to something else down there. Once you’ve found the connector, pull and twist until it pops off the surface. Now you can see the connector.

Push the tab in the middle and pull the connector apart. Before you do that though, make sure the mirror is supported by something else. If the only thing holding the mirror in place is the wire, then your mirror will fall to the ground at this point.
With the old mirror out of the way, put the new mirror mostly in place (make sure it’s supported – you don’t want this mirror to crash to the ground) and thread the new wire through the same hole where the old wire went through. If you don’t know where that way, go back to the beginning of step 4 and note that pass-through location before removing the old mirror.
Plug the connector from the new mirror into the vehicle connector (which should not have gone anywhere) and then go sit in the driver’s seat. Push the mirror buttons to test the new mirror. Does it move like you’d expect? Okay, good.
If it didn’t move, then you’ll need to fix that. I don’t know how, since mine worked right the first time.
Now would be the time in this ordeal to snap the connector back into place (in whatever it was that held it below the dashboard). I tried for a little while to get it to clip back in there, but it never did. So I let mine just lie in place. I assume it won’t get into any trouble in there. It’s not like there are many moving parts there, nor can it go very far.
Either way, let the dashboard cover drop back into place and you’re done with this step.
Step 6: Attach the New Mirror
Line up the foam gasket/seal with the bolt holes and push the whole assembly into place. Loosely install the top 2 bolts, then open the door and install the third bolt. Now tighten all the bolts.

If you’re paranoid, test the mirror power adjustment again. Otherwise, you’re done with step 6.
Step 7: Close the A-Pillar
Wrestle the A-pillar cover back into place.

If there’s a big gap between the dashboard cover and the A-pillar cover, then it’s not correct.

There – that’s better.
Make sure the rubber seal goes around the outside of the A-pillar cover – don’t let the cover cover the seal.
Bolt the handle back in place, and then snap the caps in place also. Now it looks like nothing ever happened there.
Step 8: Close the New Mirror
The insides are done, the mirror is firmly attached and working. The only item remaining is a decorative cover. It might be functional too, to keep out wet weather.
There’s no good description of this step, other than to say push the fascia into place. It should be obvious when it is right.

And that is all.
Other than to adjust the mirror for actual use.
Summary
Items needed: star screwdriver, flat screwdriver, 3/32 (or 10 mm) socket, replacement mirror.
Cost: $50-$80, depending on the source for the mirror
Time: 30-45 minutes, depending on your skills
Note: Be sure to skip step 3.
Between morning and evening they are broken in pieces; Unobserved, they perish forever.
Job 4:20


This little article thingy was written by Some Guy sometime around 11:32 pm and has been carefully placed in the Projects category.


July 20th, 2011 at 1:17 am
Hindsight is 20/20, although some objects may be closer than they appear.
January 17th, 2013 at 6:04 pm
Even though I’m a woman, I love to fix things. I’m also frugal when I’m experiencing Galatians 5:22..the patience and self control part. My mirror got nailed by a sheet of ice that flew off of an SUV that zoomed past me on the interstate last year after the ice storm. I was really grateful that it didn’t come through the windshield and kill me! Like yours, my mirror has been functional, but pretty busted up. I found one on-line for $25….yay! I figured everything out except how to get to the wire connector. Thank you so much for your great pictorial and step by step instructions! You saved me a lot of time and headache. God bless you!
January 17th, 2013 at 10:46 pm
Thanks! I’m glad it was useful to you.