
 This is Alpha, the first-born, when he was 2YO.
 This is Beta, the second-born, when he was about 2YO.
 This is Gamma, the third-born, when he was about 18MO.
ROFL Installation
Oct
4
2011
Before I start this recap of how I installed my ROFL, I should inform you that ROFL stands for Reverse Osmosis FiLter.
Some of you may recall that we had an iron filter installed several weeks ago. That improved the general quality of the water, but I wanted to ensure that I wouldn’t need to buy bottled water anymore.
So I bought a reverse osmosis filter.
The whole system was about $170. Since bottled water is $5 per case of 24 and we went through about a case a week, it will take 34 weeks to break even. Plus I won’t have to lug those cases home from the store, and I won’t have to take the recycling out every week.
The installation is easy, in theory. When you’re dealing with an old house, nothing goes quite as simply as you hope.
On to the tutorial:
This post will tell you how to install a reverse osmosis filter. Or rather, how I installed mine.
Location, Location, Location
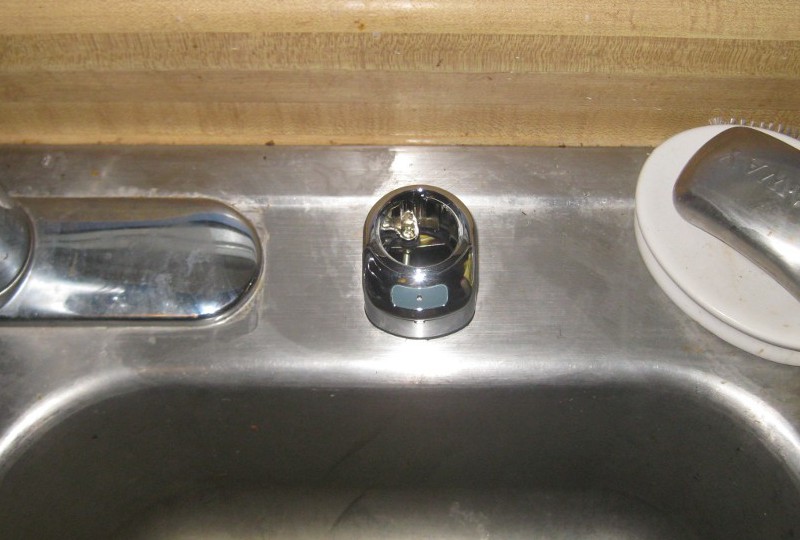
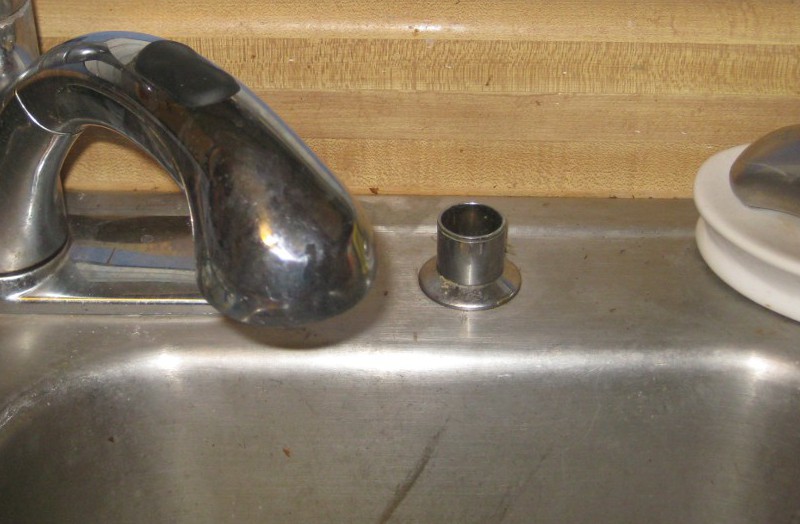 The first order of business is figuring out where to put the thing. The faucet part was obviously going to go in the kitchen sink. We already had a spare hole in the sink – it held a soap dispenser that we could live without.
 The main decision was where to put the tank and filters, not where to put the faucet.
I knew that I wanted to do as little work as possible under the sink, and I knew that I wanted to keep as much of the sink cabinet as possible for storage, so I didn’t want the tank and filters to go under the sink.
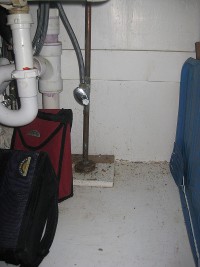
We have a basement, and part of the basement directly under the kitchen sink was right near the sump and some water lines.
Perfect!
Height Adjustment
 The instructions that came with the filter showed how to connect the unit either under the sink or in the basement. That was quite thoughtful of them.
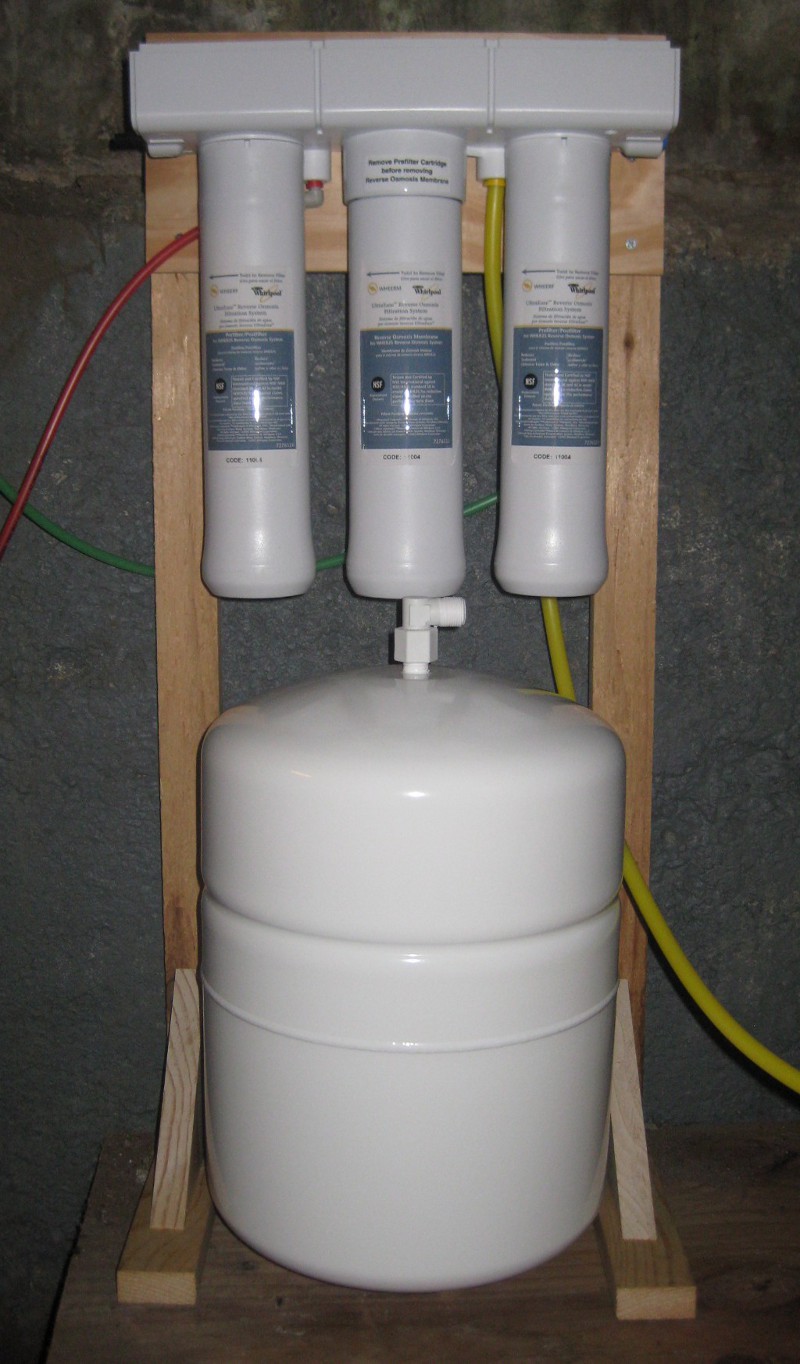
The tube that they provided to go between the filter and the faucet wasn’t long enough to reach the basement floor, so I had to mount the filter on a shelf near the basement ceiling.
Don’t worry if you don’t have that option though – the tubes are standard sizes you can find at just about any hardware store. If you want a longer tube you should be able to buy one.
Starting
Now that you have the location and the filter, it’s time to start working.
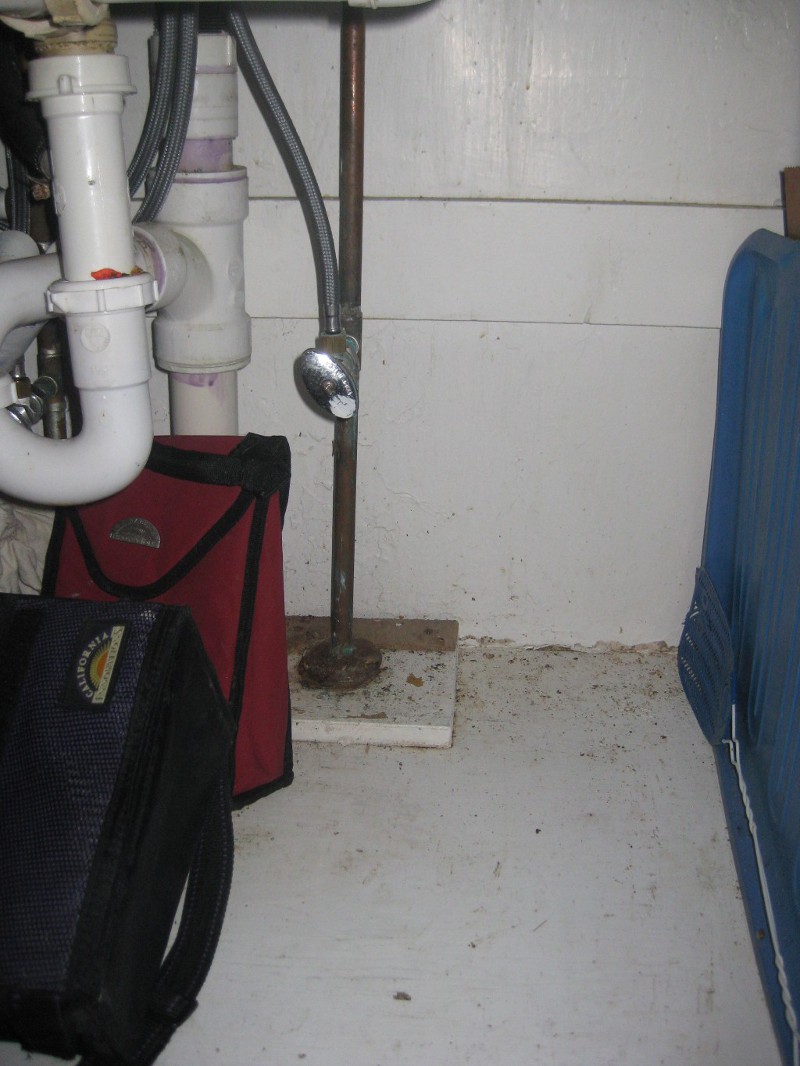
First order of business, clean out the area under the sink.
Not Clean
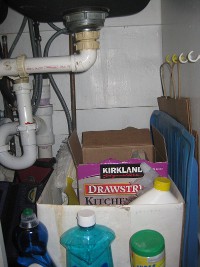
Clean(ish)
Next order of business, run the two tubes from the faucet area to the filter area.
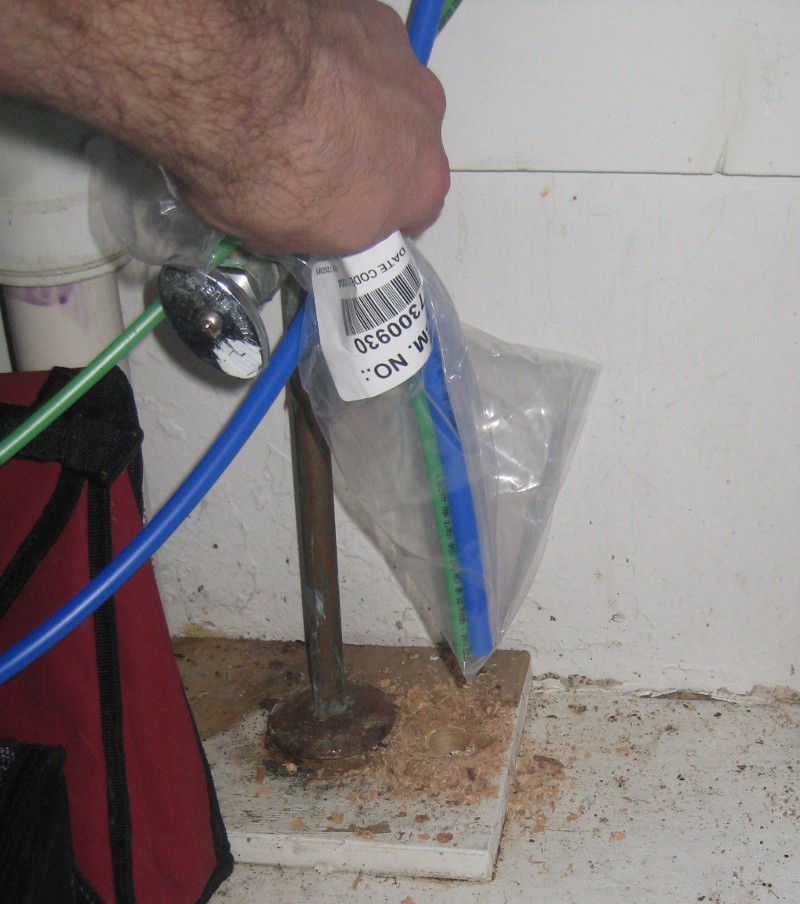 Ideally, there would already be a hole for you to use. I tried that, but there wasn’t enough room so I had to drill a new hole. Because there is insulation and sawdust and mice and whatever else in between the kitchen floor and the basement ceiling, cover the supply tubes so you don’t get that junk inside them. I wrapped them in a plastic bag – simple and easy.
One tube is to supply the water to the filter, the other is to take the clean water from the filter to the faucet. The filter maker color coded the tubes, but it doesn’t really matter as long as you have the right size. There are 1/4″ tubes and 3/8″ tubes – all standard sizes available at most hardware stores.
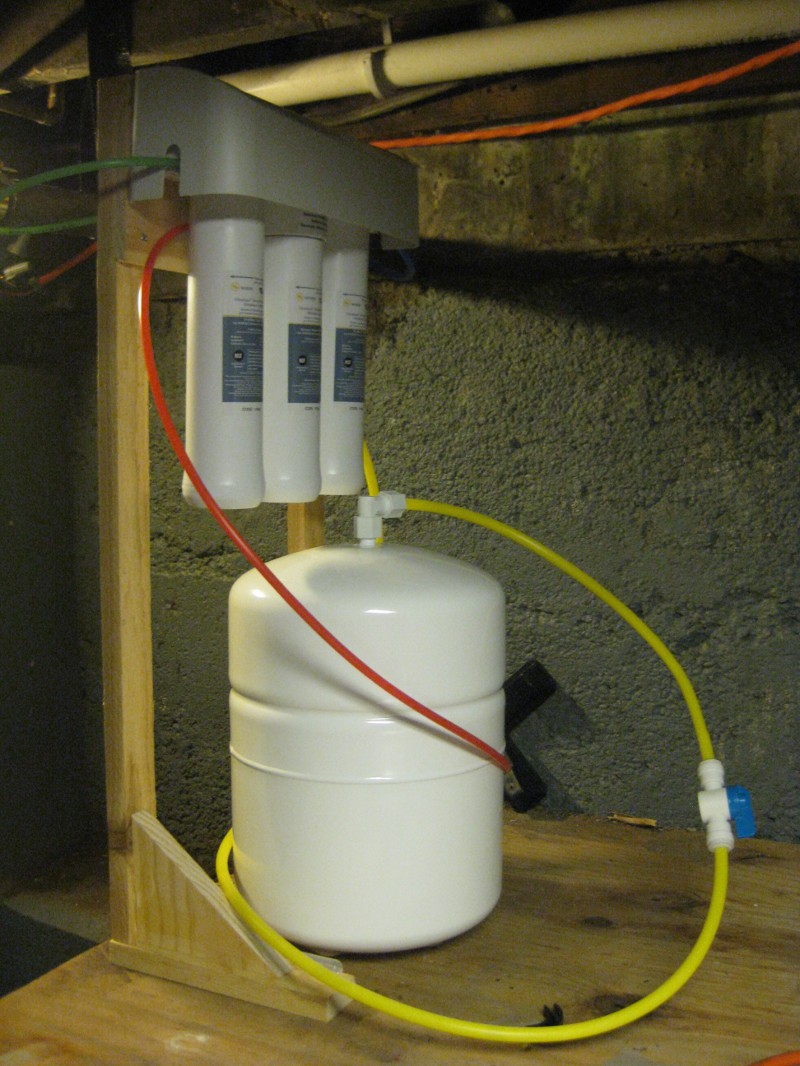
To the Filter
With the tubes run to the basement,
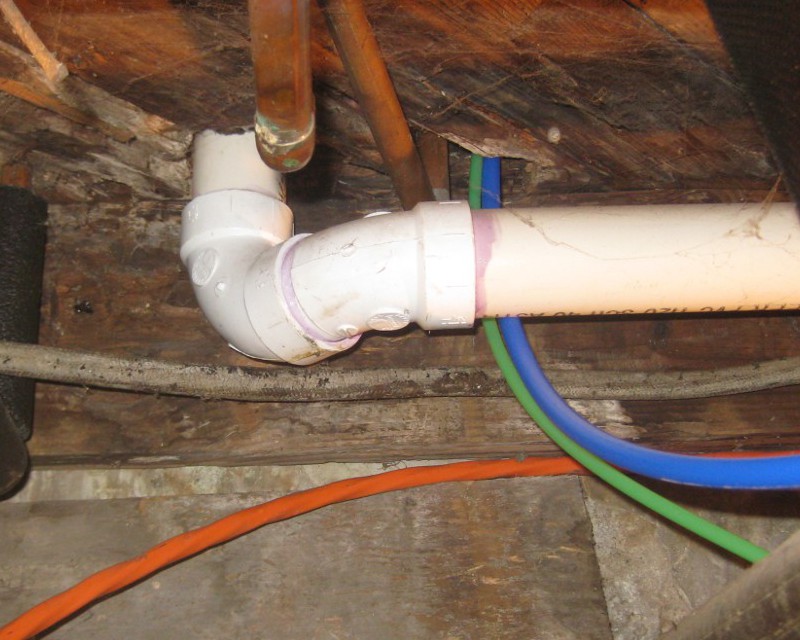
now you can connect them to the filter.
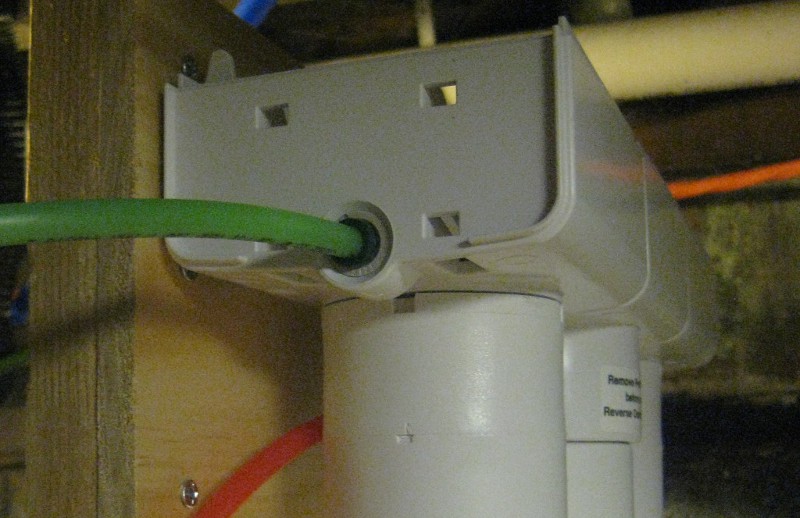
They should also be connected to the faucet at some point.
Since my filter was right above the sump pit, I just let the drain line dangle over it.
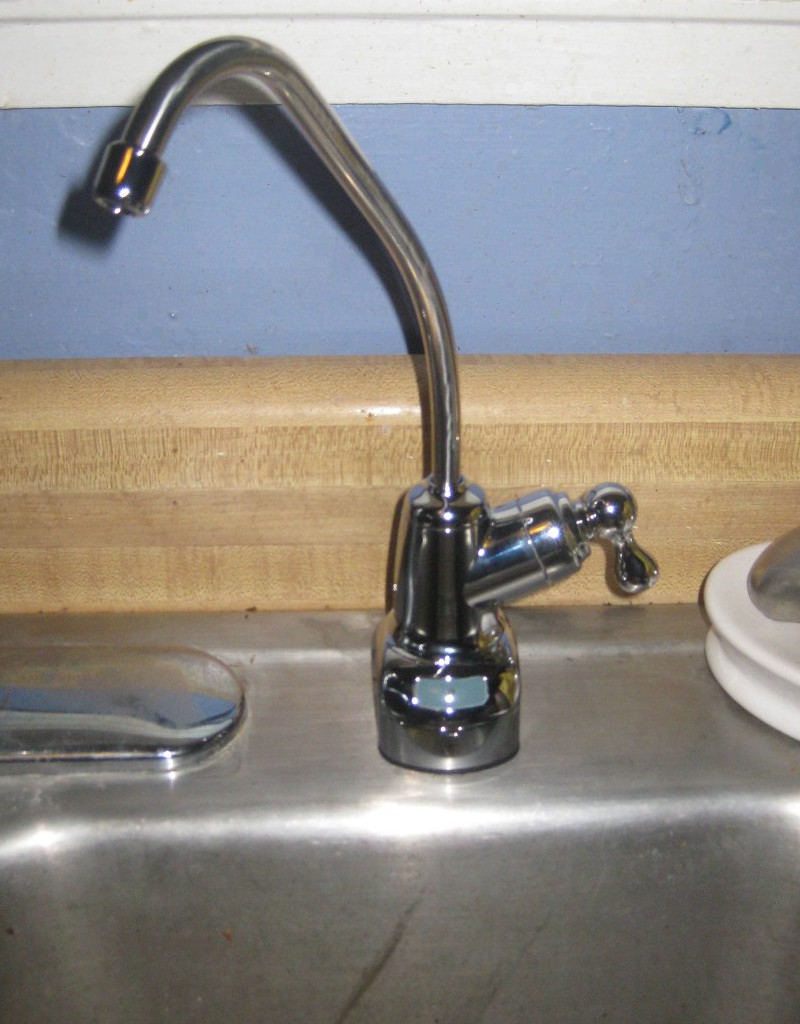
The Faucet
Installing the faucet on the sink was easy. The base fit in the existing hole and the provided clamps secured it well. Then the actual faucet just dropped right in.
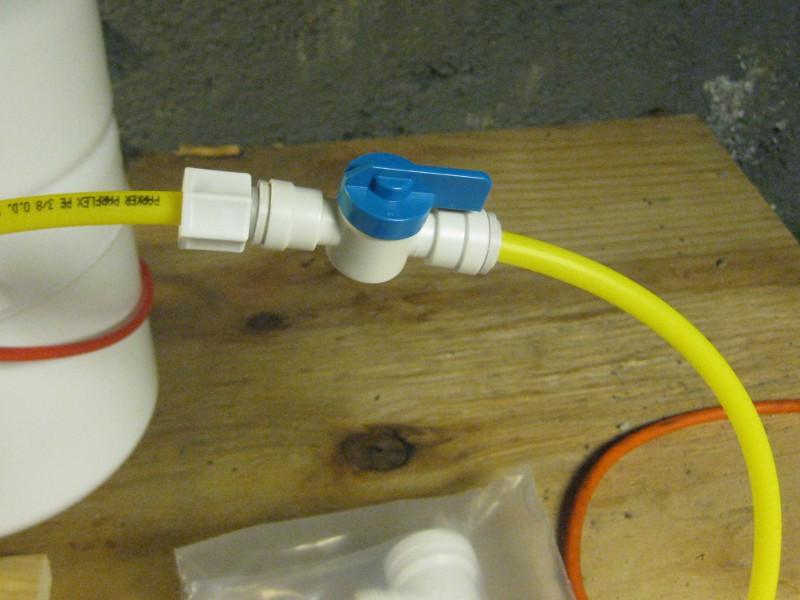
Cutoff the Tank
I heard one piece of advice before I started this project, and that was to install a cutoff valve in the line to the pressure tank. The tank stores about 3 gallons of clean water, which helps ensure a continuous supply for the faucet.
 The drawback to that comes if there is ever a need to service the filter. If you need to disconnect the tank from the filter, then you’ll have to drain (i.e. waste) 3 gallons of good water before you can do anything with the filters.
Spend a few dollars and install an inline valve. Then, if you ever need to disconnect the tank, you can just flip the switch and the gallons of water will stay in the tank.
Make sure everything except the tank is connected, and proceed to…
Connecting the Supply
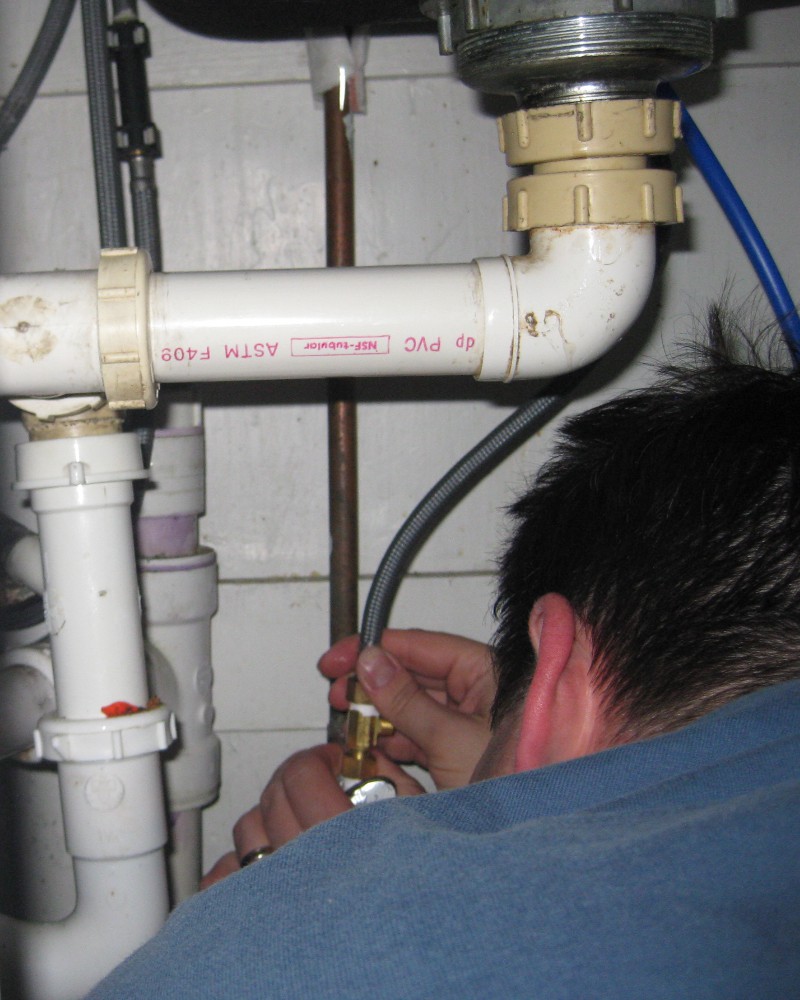
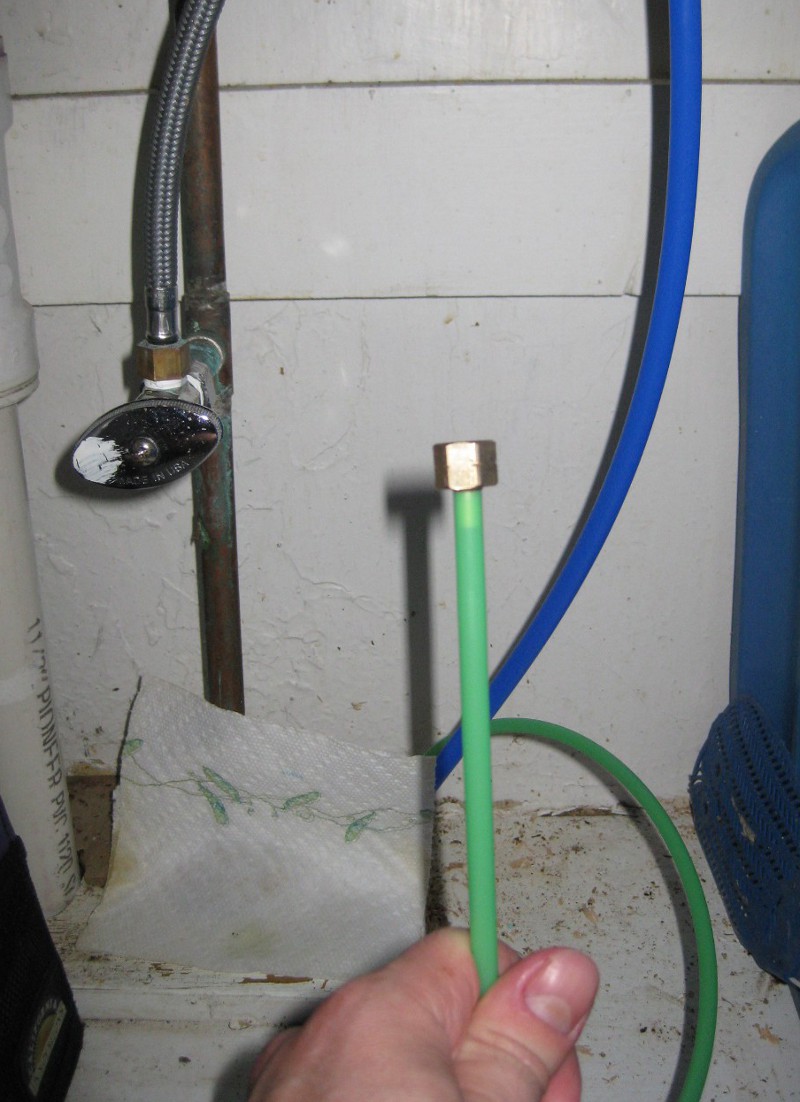
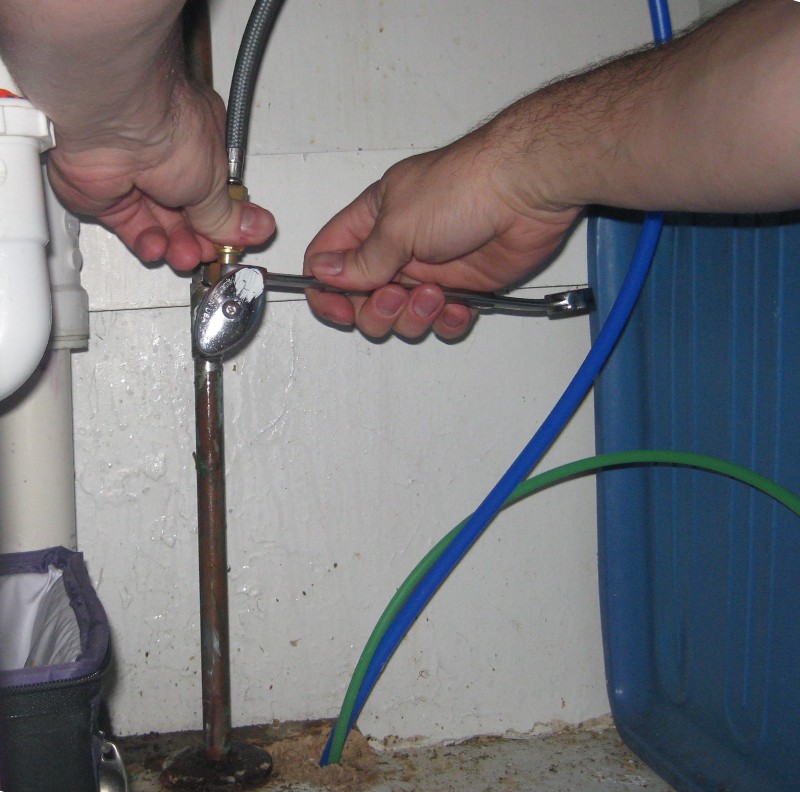
 Connect the supply line to the cold water supply for the kitchen sink. Easier said than done, in my case. First off, disconnect the supply line from the sink. Be sure to put something under in to catch the dripping water.
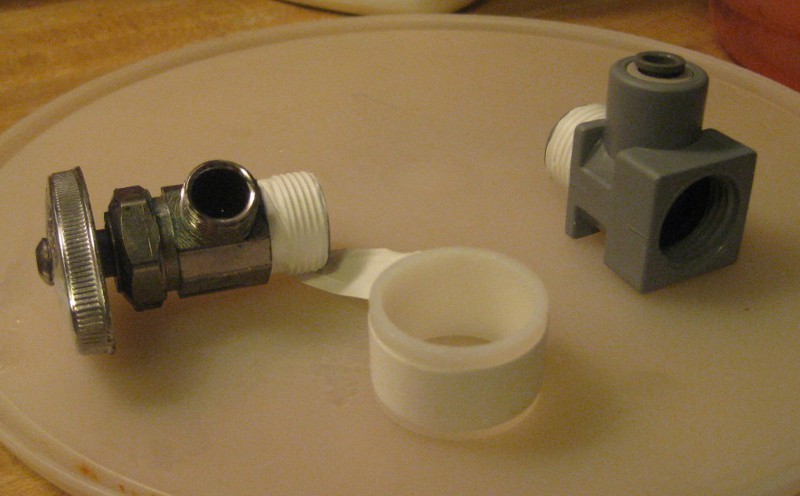
The filter manufacturer provided a connector to go from metal sink supply to vinyl tubing.
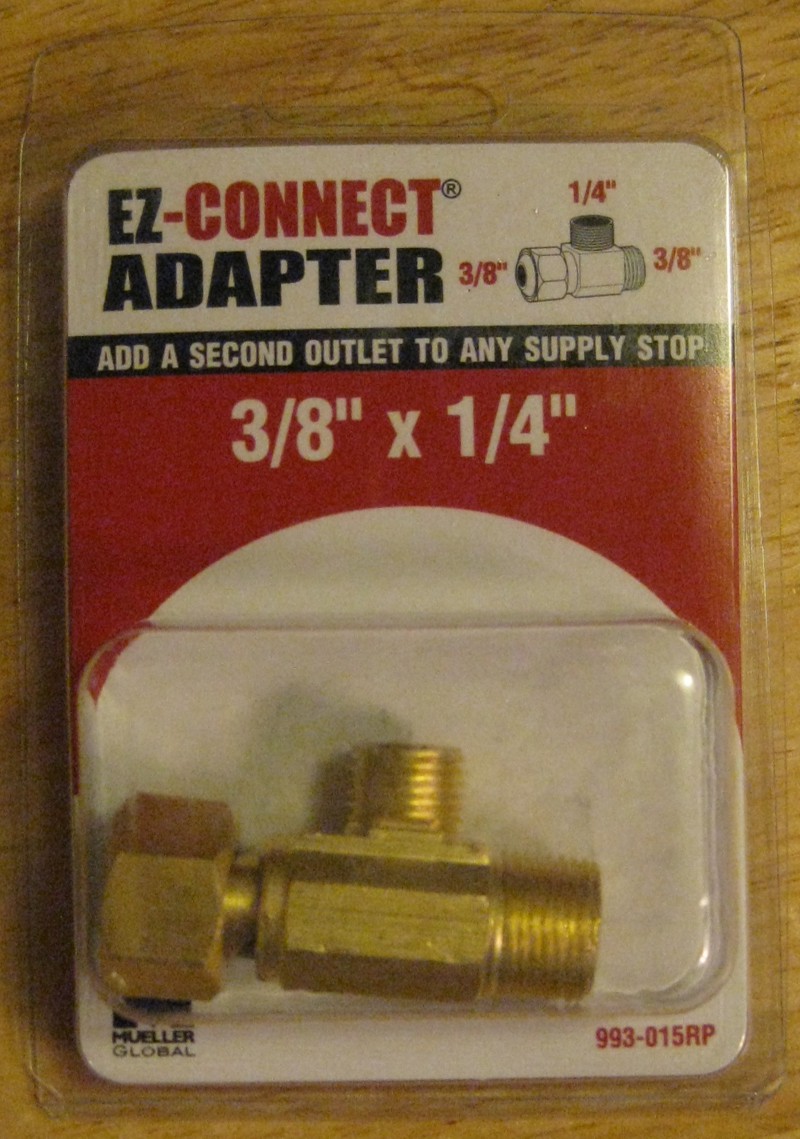 The connector was the right diameter, so I started screwing it in. The problem was that the thread pitch was wrong, so it didn’t screw on correctly. And it was plastic, so the metal threads damaged it.
I went to the hardware store and looked for a replacement with the right threads. They didn’t have anything for that application though.
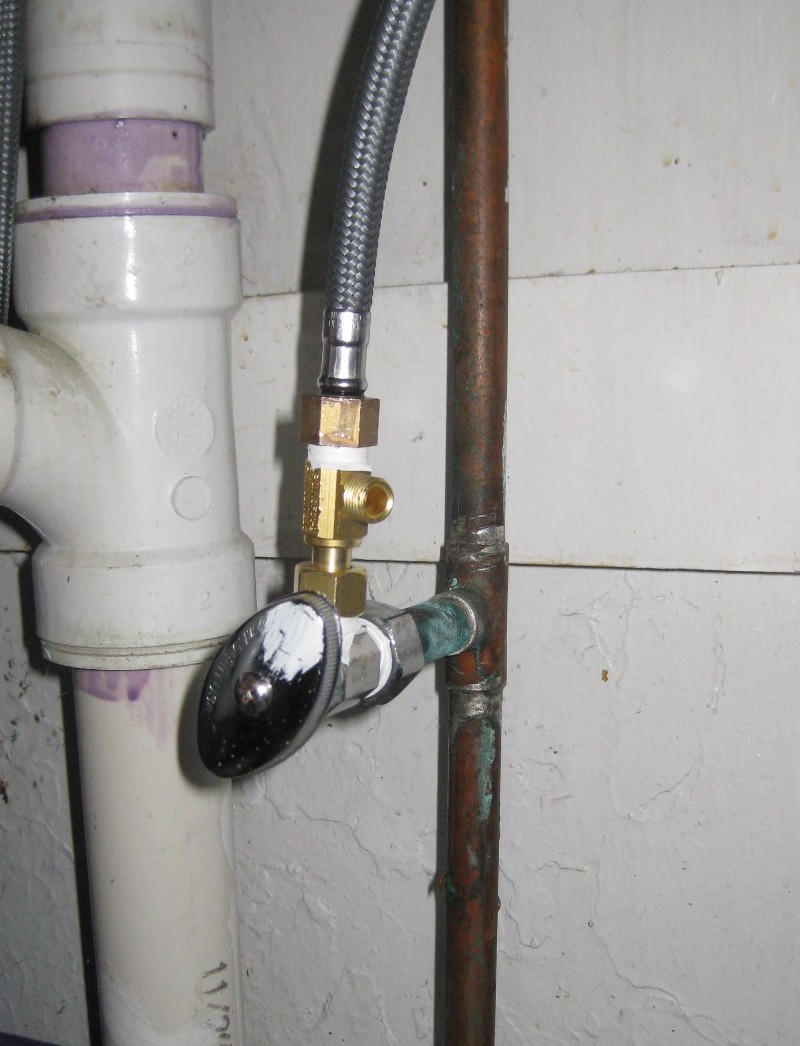
The next day, I went to a different store. They didn’t have that either, but I did find a connector to go from the sink line (3/8″ flex line) instead of the supply valve (1/2″ copper).
That turned out to work perfectly, and I could finish the installation.

Finish
The last step is to sanitize and purge the system. Pour some bleach into the tank line (make sure the valve is open), connect the tank to the filter, and turn on the water supply and the faucet.
The water will run through the system and flush everything out. Make sure to check each part of the system for leaks at this point.
Conclusion
If you are going to be installing a reverse osmosis filter, don’t worry too much about it. The instructions that came with the unit were sufficient for the installation.
I’m happy with the RO filter.
I’m more happy that I don’t have to deal with water bottles anymore.
Nevertheless a spring or a cistern collecting water shall be clean, though the one who touches their carcass shall be unclean.
Leviticus 11:36


This little article thingy was written by Some Guy sometime around 6:35 pm and has been carefully placed in the Projects category.


October 4th, 2011 at 10:00 pm
We don’t have a basement.
We do have a kitchen sink, but I’m a bit too lazy to install one of those things.
We get our drinking water out of the fridge. Don’t worry, it has a filter.
You’re supposed to change it every few months. We’ve had it almost 8 years.
October 4th, 2011 at 10:29 pm
We drink the tap water, but then again, we have a good city water system.
October 5th, 2011 at 12:26 am
I installed a ro pure system under our sink. But that’s because a nearby town found frogs with extra legs. Too much radiation research going on around here. In a year I’m going to have to uninstall it though. Hopefully the instructions are just as clear.